Do you remember the days when to go grocery shopping you made one trip to the vegetable and fruit market, another to the meat market or butcher, yet another to the bakery, and lastly to the delicatessen for your cheeses and processed meats. You even had deliveries from milkman and egg man (goo goo g’joob). Quaint but not that convenient to put meals together.
Later came the supermarket, with everything under one roof. One trip. One and done. A real time saver.
When it comes to dispersion modeling, especially when preparing the meteorological input data, you have to gather four datasets to run three different programs (one of which has three stages) to generate two data input files to execute one model run. Sounds a bit inconvenient but you have ALL been doing this for decades.
NaviKnow is building a supermarket for your meteorological input data with a self-checkout lane.
AERMET Made Easy Recap
In the AERMET Made Easy webinar series, we stepped you through the process to generate meteorological input data files for used with AERMOD (go to https://learn.naviknow.com/p/aermet-made-easy-preview to view a replay of each installment. If you haven’t already, you will need to create a login. Some effort, but well worth it.). We provided tips and information to take a process that would literally take many hours to days to research, execute, and complete, to one that can be finished in a little over an hour or a few minutes.
In the first three parts, we showed you WHERE you can find all the data needed (hourly and one-minute surface data and upper air data) to complete the first two stages and HOW to locate it to download. This part of the process alone is the most time consuming if you did not know where to look or what to look for. We also demonstrated, with the proper tools, such as the NaviKnow GeoDataBase and the NaviKnow Land Use tool, you could find and download all the raw data you need in a hand full of minutes.
For proof, see the videos below.
Before you can run AERSURFACE, you do need to download land cover data (the milk and eggs). When you use AERSURFACE, ask yourself if the data you are using is temporally representative, as highly recommended in the GAQM. In most locales, it will make a difference. It is just a matter of how much of a difference. See more details on this subject in a previous article on landuse/land cover data.
Interface, Intersmace
If you have available to you one of the many commercial dispersion modeling interfaces, you now have all the information you need just to get started with the actual input to AERMET. If you decided to save your money, we showed you how to build your own input files. All you would need is a text editor program (NotePad, WordPad, etc.). Just follow the steps in our article AERMET Made Easy – AERMET Input Files. It’s all the same information but not as pretty.
The Dispersion Modeling Supermarket
With the information and links above, we have shown you how to reduce the time between all the places you have to go to put your meteorological data together. Now we are going to introduce to you the equivalent to a dispersion modeling supermarket with everything you need ALL under one roof.
First, there is the interface. It’s modern and clean. If you find yourself waiting at the airport or at the doctor’s office and don’t have your laptop available, just open your browser on your phone, and there you go.
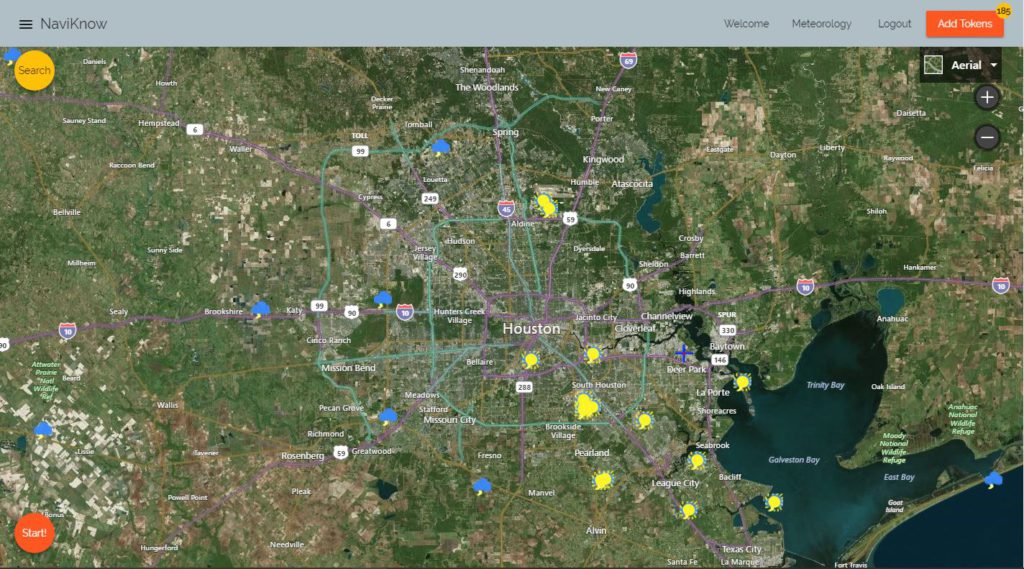
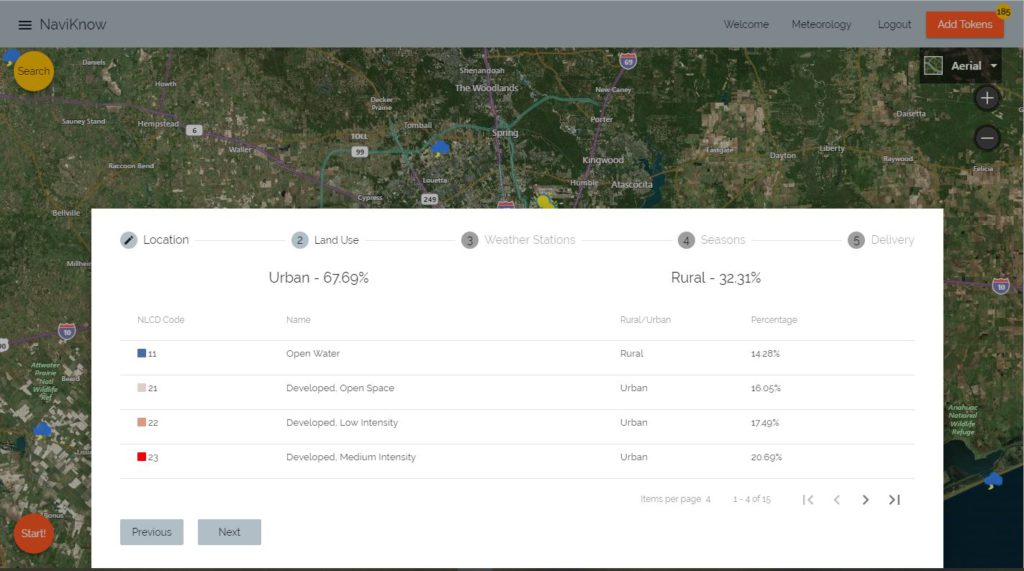
Once you place your cursor on where your site of interest (application site) is located (no typing of coordinates is necessary, but you can if you want) you have the land cover analysis for the site nearly instantly available.
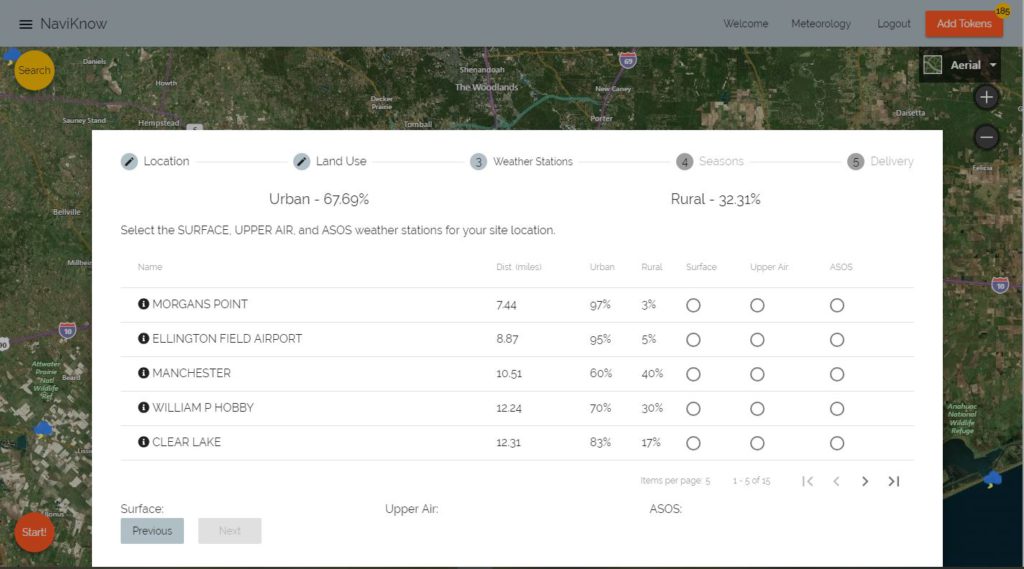
Touch the next button, and you have a listing of weather stations that are nearest to your site of interest that is sorted by distance. You all are provided the land cover analysis for each of the weather stations in the listing and what type of data the station has available. Just select which stations for which dataset you want.
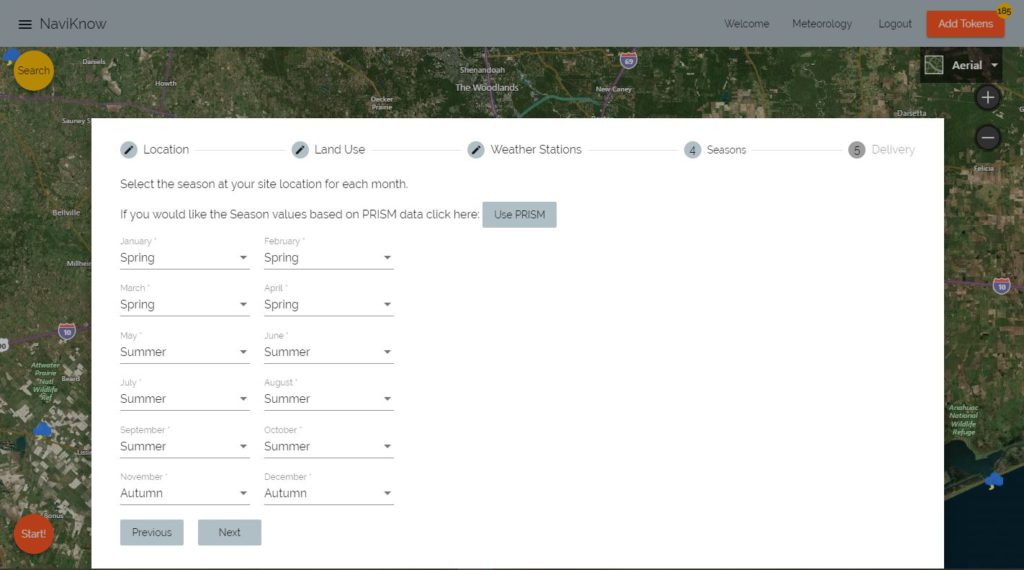
Going to the next step, you can then assign the calendar months to the appropriate season in order to calculate your meteorological surface characteristics (albedo, Bowen ratio, and roughness length).
So now you are DONE. Yes, DONE! All that is left is the check out.
Let us know how to contact you when all of your project’s information, raw and processed, and all the documentation necessary to submit to the appropriate regulatory agency are ready.
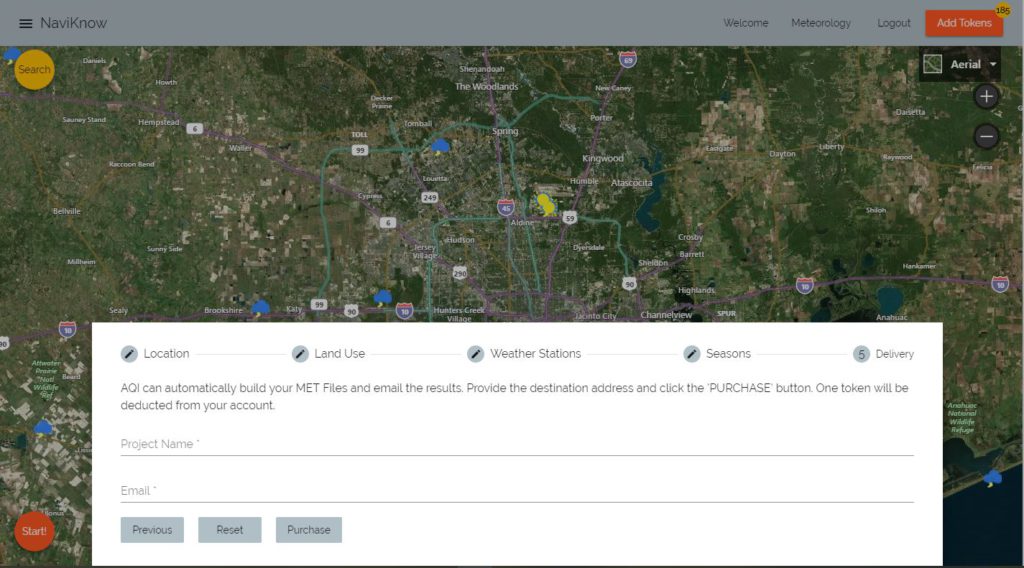
Lastly, let us know how you would like to pay for your purchase.
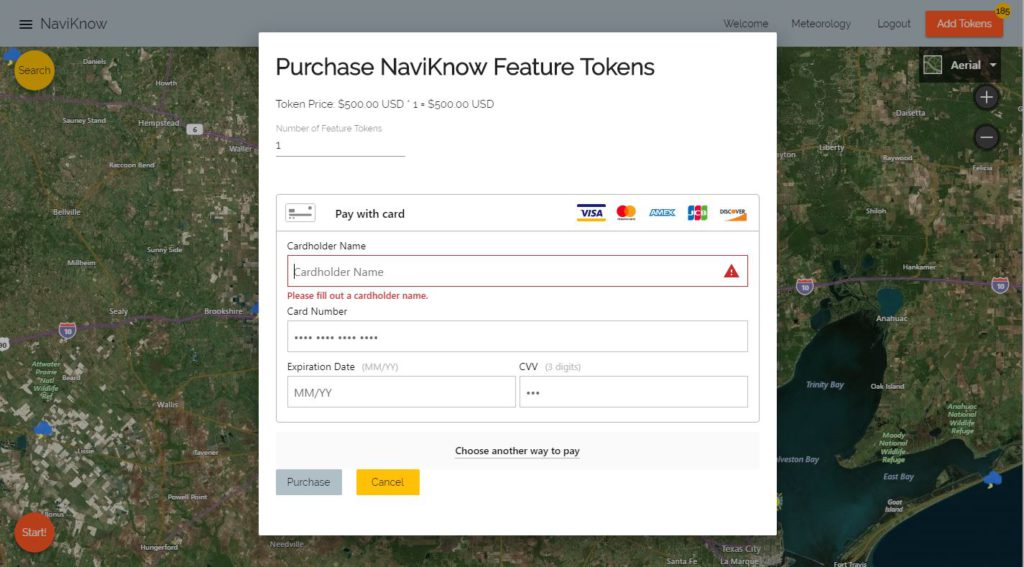
Within a few minutes, you will have everything you asked for delivered to you.
All this functionality isn’t ready yet, though. But it will be early 2019.
Free Samples Are Available
If you have been to any of the webinars presented by NaviKnow or enrolled in any of our online mini-courses, you know we provide a wealth of actionable content free of charge.
Once you have created a login, you will have available to you, for FREE:
- Weather station data
- Station identification
- Station Name
- USAF ID
- WBAN ID
- WMO ID
- ICAO ID (four letter call sign)
- IATA ID (three letter call sign)
- Station Lat/Long,
- Station Elevation,
- Station time difference from Greenwich Mean Time (GMT), and
- Percent Data Completeness of the data set (you don’t want to download a dataset only to find out later it does not meet EPA’s regulatory completeness criteria.)
- Station identification
- NaviKnow’s Land cover tool with access to NLCDs for
- 1992,
- 2001,
- 2006,
- 2011,
- 2016
- Data file access and download for:
- One-hour observations in ISHD format
- One-minute observations for use with AERMINUTE
- Upper air data in FSL format
The number data downloads will have a limit. We are working out what that limited number will be.
With all that FREE information what do you have to pay for? What you pay for is having all the data above processed, all the calculations performed and documented, and all processing and calculations summarized into a report along with the model ready data files for use with AERMOD.
Sounds like a pretty good deal.
Summarizing
In the AERMET Made Easy series, we showed you how to more easily get the information needed for AERMET, put together your input files, and then execute AERMET and all associated programs (AERMINUTE and AERSURFACE). In this final installment of the series, we showed you how building your meteorological input can be just plain EASY.
The tool we have developed isn’t quite ready, but we have a proposed release date of early 2019.
